Many people mix up plain black polish with true spooky nails, but the first stays flat on the nail while the second layers in 3D elements, matching accessories like a velvet cape or SFX makeup scars on the hands. A basic black coat takes under five minutes yet leaves the rest of the costume looking unfinished, whereas designs that add tiny coffin charms or blood-red drips require an extra twenty minutes and instantly tie the whole look together. The difference shows up most when you hold a plastic prop sword or pull on lace gloves—the nails either disappear or become the focal point. This roundup skips single-color suggestions and instead pairs each design with one specific accessory and one SFX makeup step so your hands actually belong to the character you are wearing.
spooky nail designs for halloween
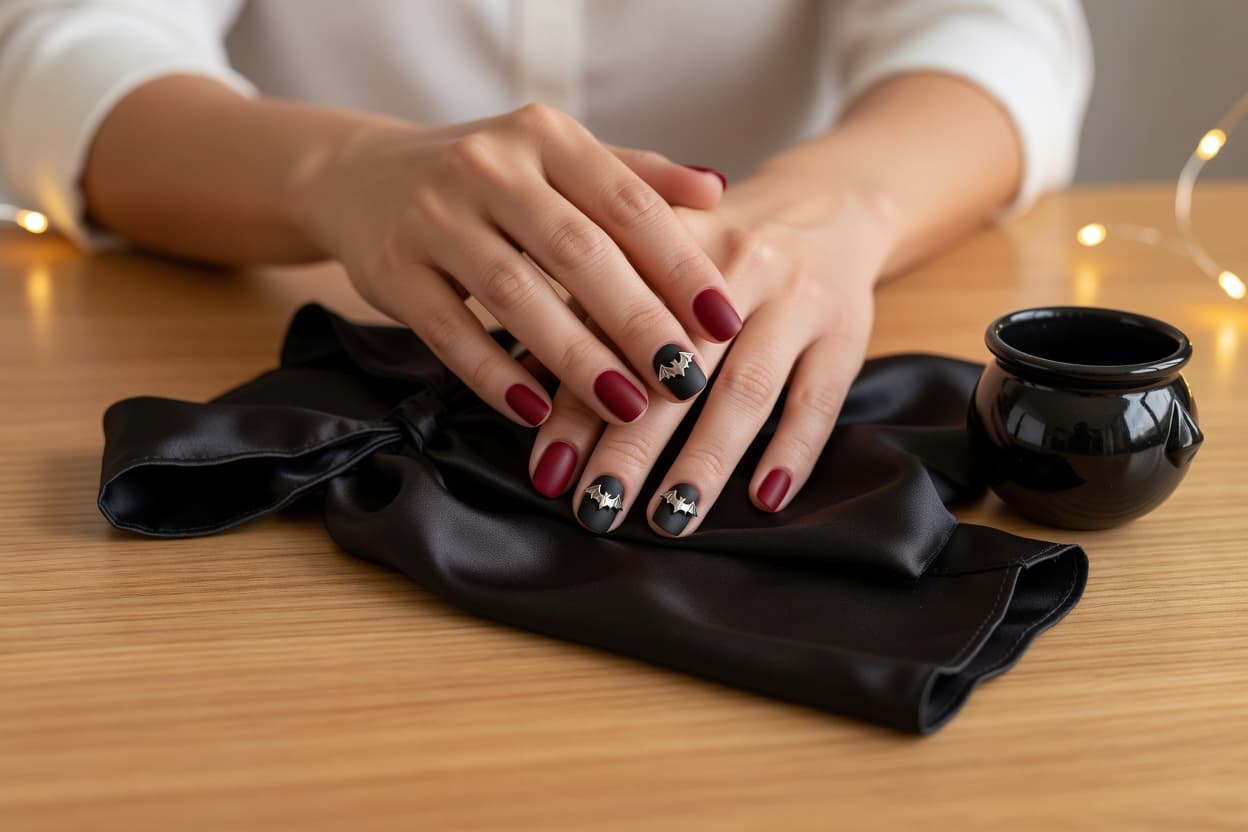
Start with a vampire theme using deep burgundy gel polish as the base, then press two tiny silver bat charms onto the ring finger while the polish is still tacky. This design takes roughly twenty-five minutes total and pairs with a black satin cape plus a quick swipe of white face paint across the knuckles to mimic pale skin. Use a thin detail brush to draw one thin red line along the cuticle that looks like a bite mark; the line dries in under a minute with a UV lamp. If the charms feel too fiddly, swap them for a single strip of holographic coffin-shaped foil on the middle nail. The finished set holds up for five to seven days with proper topcoat and works best on medium-length almond or coffin shapes rather than short squares.
scary nails for halloween
Zombie nails begin with a base of mossy green acrylic mixed with a touch of gray pigment, then add three raised pimple dots made from clear builder gel on the index finger. The full process takes about thirty-five minutes and matches a torn flannel shirt plus a line of dark brown cream makeup dragged across the back of the hand to look like dirt under torn skin. File the free edge into a jagged shape before painting so the nails already appear broken. One practical detail: apply the raised dots only on two nails per hand so the design stays balanced and does not snag on fabric. A matte topcoat keeps the green from looking shiny and fake under party lights.
halloween scary nails
Witch designs use matte black polish followed by a single gold crescent moon charm placed off-center on the thumb nail. Expect twenty minutes of work and pair the look with a pointed felt hat plus a streak of green SFX cream along the wrist bone. Draw three thin spider-web lines with a white striping polish on the pinky; each line needs only one quick stroke before curing. The charm stays secure when pressed into a dot of clear gel rather than regular polish. This set photographs well against a wooden broom handle or a small cauldron prop and lasts through one full evening of handing out candy without chipping.
spooky nails ideas
Ghost nails rely on a sheer white jelly polish layered three times for an opaque fog effect, then add two tiny black dot eyes on the ring finger with a dotting tool. The design finishes in fifteen minutes and coordinates with a flowing white sheet costume plus a single swipe of translucent blue powder on the cuticles to suggest cold mist. Keep the other nails plain white so the eyes stand out; adding eyes to every nail makes the set feel crowded. A glossy topcoat gives the ghosts a floating look without extra glitter. The whole manicure stays lightweight enough for typing or holding a plastic pumpkin bucket all night.
Quick Tips
- ✓Apply a thin layer of cuticle oil the night before so the skin around each nail stays flexible when you press on 3D charms.
- ✓Use a magnetic tool to pull silver polish into a cat-eye streak on one accent nail instead of adding extra charms that might fall off.
- ✓File every nail to the same length first, then paint; uneven lengths make even simple designs look messy under flash photos.
- ✓Store press-on spooky nails in a small zip bag with a silica packet so the adhesive stays strong for multiple wears.
- ✓Test any new gel color on a single nail the day before the party in case the shade reads too bright under orange string lights.
- ✓Keep a small bottle of quick-dry topcoat in your costume bag for touch-ups after the first hour of wearing gloves or holding props.
Shop it at Abracadabra NYC, the store behind this list:
Shop Makeup & Beauty →
🎯 If you only have ten minutes, grab a set of pre-made press-on spooky nails that already include the charms and pair them with one SFX makeup step on the hands. For a longer session, follow one of the four designs above and add the matching accessory so the nails actually complete the costume instead of sitting on the side.
💡 Most roundups skip the step of testing how the finished nails interact with actual costume fabrics like lace gloves or velvet capes before the event night.
Frequently Asked Questions
how to make spooky halloween nails+
Begin with a base color that matches your costume palette and add one raised element such as a charm or gel dot on only two nails. Work in thin layers, curing each under a lamp for sixty seconds so the 3D pieces stay attached through an evening of movement. Finish with a matte or glossy topcoat depending on the character and pair the nails with one small accessory like a cape or hat plus a matching SFX line on the skin.
best spooky nail designs for halloween+
The strongest options combine a simple polish base with one concrete 3D accent and link directly to a costume piece and an SFX makeup detail. Vampire burgundy with bat charms works with a satin cape and white knuckle paint, while zombie green with raised dots pairs with torn fabric and dirt cream on the hands. These designs take fifteen to thirty-five minutes and stay balanced so the nails do not overpower the rest of the look.